Understanding Wood Stain Techniques
There is more to staining wood than just applying the desired hues of color. In many cases, a close friend, family, or co-worker would suggest what to use or what they have used, but is what they suggest the best staining techniques or the best stain to use?
To answer this, yes. The best wood staining techniques and stain application methods are discussed in this article.
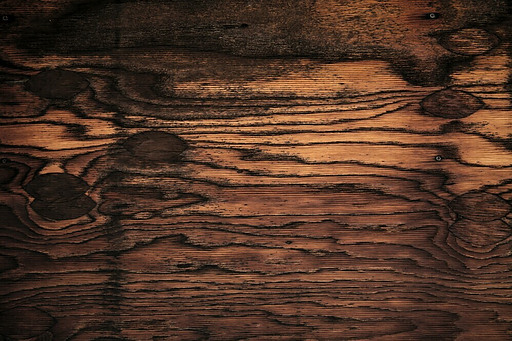
First off, understand that staining wood helps bring out the beauty of the wood and the grain pattern. Adding stain to wood can enhance its natural grain or color-shift patterns that you might not have noticed otherwise.
Clarification of what wood stain is and its fundamental purpose
Many people wonder, what type of stain should I use? It is not that hard to decide. The type of wood or the type of intended project and whether the project is going inside or outside.
Nonetheless, some people would consider staining loosely with finishings or sealing the wood. The purpose of staining is to enhance the natural beauty of wood.
Overview of the different types of wood stains available
There are four common types of stain used today.
1. Water: These are stains that are combined with water and dye/pigment that make up the color. These stains dry fast and are easy to clean.
2. Oil: These stains are combined with oil and dye/pigment. This type of stain takes longer to dry than water-based stains, 8-24 hours depending on the temperature. The true purpose of oil stain is to penetrate deeper into the pores of the wood which gives an enduring finish look.
3. Gel: This type of stain is a combination of dyes/pigments and oil, but it is thicker than oil stains. Vertical surfaces are best suited for gel stains. Like oil stains, gel stains take longer to dry than water stains.
4. Varnish-based stains: Varnish-based stains consist of varnish and pigment. The finish is durable and easy to apply. Drying times vary due to temperature.
To ensure an even application of stain, it is important to prepare the wood surface properly. Here are some steps you can follow:
Ensure the wood is clean and dust-free. Believe it or not, dirt and dust will contaminate the stain leaving unwanted blemishes and unsightly clumps within the stain. Use a clean tack cloth to clean dust off the wood.
It is a good idea to use a pre-stain conditioner before you stain the wood. To do this, use a foam brush or a rag to apply. The purpose of the pre-stain is to help stabilize the wood grain and fill in the small pores within the wood. Go in an even direction when applying the pre-stain and wipe off any excess.
The wait time for the conditioner to dry is not long. After the pre-conditioner dries the desired stain can be applied.
Safety tips and best practices for handling wood stains
Wearing rubber gloves helps protect your hands from the chemicals in the stain. Also, wear long clothing that covers your arms and legs or a Tyvek suit if you are using a sprayer. Goggles or safety glasses that cover your eyes, including from the sides.
It is a good idea to have plenty of water, and mineral spirits or thinners to clean your tools or for that “oops” moment. If you are staining inside, make sure you have plenty of ventilation. You can open all windows to create a draft and don’t inhale the fumes. You can use APRs (air-purifying respirators). These respirators stop harmful gasses within the filters while you’re breathing. Cover any containers with their lids tightly.
Mastering the Application: Methods for a Flawless Finish
Brushing technique: types of brushes and strokes for even coverage
The type of brush is part of the technique of staining. Use high-quality brushes. The other key is practice, practice, and yes, more practice. Depending on the stain you have selected will determine the type of brush to use.
For water-based stains, use a synthetic brush going in long smooth even strokes. For using oil-based stains use a natural bristle brush with long smooth even strokes from end to end.
There is also cross-brushing. For this method, simply apply the stain going in one direction then go back over going in a perpendicular direction. This method allows the stain to be applied evenly with bare minimum visible brush strokes.
Another type of brush technique is feathering. To do this technique, brush the stain lightly over the surface of the wood in a back-and-forth flow. This technique will also create a smooth finish.
The circling technique is the use of the brush being applied in a circular motion. This method will create a textured finish to the surface of the wood.
The wiping technique is simply applying the stain with a brush and then wiping the stain back off with a cloth or rag. This method creates a refined finish.
The dipping method consists of submerging small items completely under the stain and letting it set for an allotted amount of time. The advantages of this method are that it’s fast and stains uniformly.
After the item is removed from the stain solution rinse the item off with water and let it dry. However, there is a disadvantage to this method. If the item is too large or has lots of curves and shapes or angles, this could cause the stain not to be uniform.
Spraying method: equipment needed and tips for achieving uniformity
For this method, you must have the correct equipment. With a precise sprayer and the right nozzle tip, it goes with the size of the job you are about to do. This goes for both contractors and DIYers. With the right sprayer and tips, you need air pressure to push the stain outward from the container holding the stain.
It is best to practice this method to ensure a consistent and even coating.
When spraying avoid large droplets of stain landing on the surface of the wood. This could cause a clumpy look. Small droplets will give the surface a dry peppery look. The same goes with over spraying, this would cause a thick look.
When using a sprayer, it depends on the amount of air needed to push the stain to the surface of the wood and distance from the surface. The distance is usually 6-8 inches or 8-10 inches away from the surface, depending on what type of air gun. Keep the air gun uniform throughout the process of spraying the surface of the wood. Depending on the type of stain will determine the right tip and spray pattern, so practice before you do the real job.
Comparative analysis of techniques based on finish quality and work involved
The surface of the wood must be prepared for a high-quality finish look. It all starts with preparation. Sanding to get that ultra-smooth feel and look for fine furniture or high-end wood projects. Fill in the holes, gouges, or cracks with wood filler such as Gorilla High Performance natural wood filler. The filler is sandable as well as paintable and stainable.
Although there are two different types of fillers. One is a one-part which is for interior use, and the other is a two-part which is used for indoor and outdoor use. The two-part is wood putty. The wood putty consists of a plastic and oil solvent mixture. The wood putty is not sandable but once applied wipe away the excess with a damp cloth and let dry. Once the putty is dry, a color-match paste mixture is applied over the putty and lightly wipe the excess away and let dry.
Once the surface is prepared, the selected stain is applied. Follow the directions and desired techniques for applying the stain to the wood, whether by brush, rag, or spray.
There are other ways to fill in small cracks and dents with colored putty sticks that look like crayons, but they are not a popular method for fine-finished furniture. It is, however, a quick fix that draws the eyes away from the small scratches or nicks as the putty fills the area. The technique is to rub the putty stick over the scratches or small nicks until the scratches disappear.
Conclusions
The best wood staining techniques come down to the type of wood and the type of stain needed. From there, is the project indoors or outdoors? Is there a lot of moisture in the location? These are questions that must be addressed to have the right stain.
Do you know a different method for applying stains not mentioned in this article? Please feel free to mention it below in the comments section.
Homer