A Hair Pulling Moment
Have you ever had the hair pulling or holding your breath till you pass out moment because of an exterior door threshold not going to your plan? What about installing hardwood tongue and groove flooring and the last piece of board in place, and you open the door only to see it doesn’t open all the way because the flooring is too thick in one area?
Another hair pulling incident is the exterior door is too high, and you can see daylight underneath the door. This can be frustrating. Believe me, I thought I had it all figured out with the measured thickness of the plywood and the thickness of the hardwood floor. Calculating the measurements, I figured this was going to work.
There was one unseen factor. With the front door closed shut, I noticed about a foot inward from the threshold, the floor slightly tilted upwards. This was not noticeable to the naked eye. How I found out was the hard way. Of course, nothing rarely goes as planned.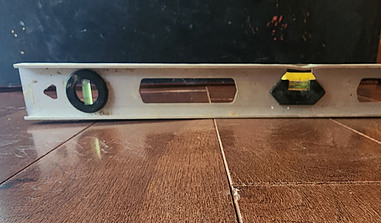
Opening the door would drag across the hardwood finish. OUCH! This did not sit well with me as I saw small scratches across the finish of one of the hardwood boards. Yep, this was a hair pulling moment, more like profusely cursing.
After my quick burst of hair pulling, I sat down to brainstorm and visualize what to do and how to tackle this new problem.
Click ToolBarn.com to shop at ToolBarn
The Plan “A”
My initial plan was to raise the door with the hinges. I nodded with a yes-this-will-work attitude and took the front exterior door off the doorway. Taking one of the hinges off the door, I traced the hinge onto the wood and raised the hinge about 3/16 inches upwards. I took my oscillating tool carving the outline of the pencil mark.
I grab my 1-inch flat wood chisel and hammer and lightly start tapping the back of the chisel. I chiseled out a recessed but made sure the area was flat for the hinge to ensure proper fit and did likewise for the other two hinges.
Next, I place a hand towel on the floor and place the tip of a small shovel under the door. With the client’s help, the client pushed down on the handle of the shovel which brought the door up so I could pre-drill holes for the wood screws then put the screws into the pre-drilled holes. The reason for pre-drilling the hole ensures the holes will not split when putting the wood screws in. Now that all the hinges are screwed into place, I closed the door.
Now, there is light between the door and the door threshold! Another moment of hair pulling.
Plan “B”
Great! What’s next? Maybe I should install a new threshold? I check on various types and various door sweeps. Seems nothing was going to work. Finally, an idea hit me like a stop sign that stated, “IDEA”. I will customize the door threshold.
This way, I could build the thickness of the threshold and customize the appearance of the final wood of the door threshold.
Building The Customized Threshold
After prying the old wood insert of the threshold out and cleaning the putty away from the edges, I gathered the desired material I thought I would need and measured the width, and length of the threshold.
I ended up using a ¼-inch subfloor panel and a ¾-inch hardwood floor. Turns out, with the new tongue and groove boards I installed throughout the client’s house I could use the same type of board for the exterior door threshold. I set up my table saw to rip the hardwood board at a 35-degree angle on both sides.
Dry Fitting
I dry-fitted the ¼-inch subfloor and the ¾-inch hardwood board into place and closed the front door. I laid my cell on its side, and I took a picture which showed me if there was any daylight under the door. Turns out there was a hairline of light showing. I couldn’t see the daylight lying down but with the cell phone taking the picture, told otherwise.
I picked up the customized wood insert and subfloor and put it to the side. Measuring the old screw inserts and wrote them on the subfloor panel. I needed the measurements for a later step. Next, I glued the subflooring panel and screwed it down. After that, I marked where I needed to pre-drill holes for the wood screws.
After I pre-drilled the holes, I needed to have the wood screws slightly below the surface of the wood. I didn’t have the size I needed so I improvised by using a Philips bit. This worked well.
Now that the hardwood board is screwed down, I closed the door to check again. It was the same. The only thing left is to install a brown rubber weather strip the client bought from Walmart. Luckily, the weather strip goes with the color of the new floor. With the door closed, I figured out by sight, from the outside, where to place the rubber weather strip.
(As an Amazon Associate, I earn from qualifying purchases)
Click on the Amazon picture of the Galax Pro Heat Gun 12.5Amp Hot Air Gun Kit Variable Temperature Control to shop at Amazon

The links within this article are affiliate links which I receive a small compensation from sales of certain items.
With a hair dryer, or a heat gun, we heated the adhesive glue on the back of the weather strip and carefully placed the weather strip down on the wood insert trying to make a straight line. The next time, if I ended up doing another weather strip, I would recommend using something for a straightedge to go off from. It should be easier and faster.

Closing the door for the last time, I hoped. I took another picture with my cell phone. To my relief, there was no daylight.

Final Thoughts
Problems can arise unexpectedly even when you calculate to the best of your knowledge. Problems will show their ugly faces to challenge you. Don’t be in a rush to get things done. This could lead to more problems or time wasted. With your thinking hat on, you can accomplish many things and triumph over many challenges. Always try to think outside the box.
If you have had any similar experience or anything related to this article please leave a comment.
Any questions, comments, please leave them below and I will get back to you.
Thanks, Homer P
Hey, this came to my rescue when I was dealing with a drafty and deteriorating threshold. The step-by-step guide provided in the post was incredibly helpful and easy to follow.
It saved me both time and money compared to hiring a professional to do the job. The tips and tricks mentioned, like choosing the right materials and tools, were invaluable.
I appreciate how the writer addressed common issues one might face during the process and provided solutions. Thanks to this blog post, my door threshold looks and functions as good as new. I highly recommend it to anyone facing similar issues.
Thanks Jake,
I am glad to hear my step-by-step guide helped you in your time of need.
Thanks again,
Homer