One Piece of the Puzzle at a Time
Wood working is fun and can be easy. As a beginner in learning woodworking, there are certain things that a person needs to know and follow simple safety rules such as wearing ear protecting, gloves when needed eye protecting is a must (don’t want to take an eye out) and sometimes a dust mask to keep those nasty dust particles when sanding. Soft wood vs hard wood. The best tools to use and putting the wood project together. Soft wood is easier to work with and as a newbie to learning wood working projects this is where you should start. It all starts with soft wood such as pine. Pine is the cheapest. For argument’s sake, it makes more sense to practice on pine when starting as a newbie versus buying more expensive hard wood and make costly mistakes. Therefore, it is cheaper and practical to practice on pine until you become more proficient. What you don’t want to do is build a small wood project like the whiskey decanter with a cherry wood frame built around a glass block and mess measure or cut the wood wrong. For example, you make your 45 degree cuts on all four ends of the cherry 1×4 boards and you put them together but two of the corners don’t quite match because the boards were a hair to short or the angle was slightly off causing the board to be short which could leaving a bad taste in your mouth as if you swallowed a pack of cigarette ash or curse worse than a sailor himself. Yep! I had that happen to me. Not the swallowing ash but a short list of cursing was coming along nicely. So, the wrong measurement cost me. After having more confidants in your wood working skills you can move onward.
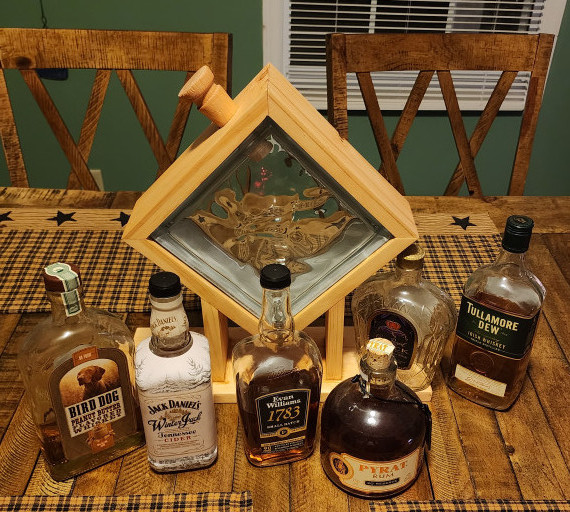
Picture of the whiskey decanter below is by me. Client wanted pine frame with a light pecan stain and a bottle of Tennessee Honey whiskey. You can read my DIY article Glass Block Whiskey Decanter on how I built this.
The Growth of a Tool List
A person needs to have a good set of tools. They don’t have to be expensive. I was fortunate and started buying tools when I was younger because I needed tools to work with. Over the years, my tools made me money. I went on to better jobs and ended up in the IBEW union and traveled most of the right side of the US from top to bottom. At one point, on power line storm restoration in Holly Beach, Louisiana right next to The Gulf. I found that I needed another hammer and eventually went to Lowe’s in Port Arthur in Texas where I was staying at and bought a 20oz framing hammer. Since then, I make comments such as, “That hammer came from Texas and has made lots of money for me” or “Grab ole Texas, he’ll gitter done!”
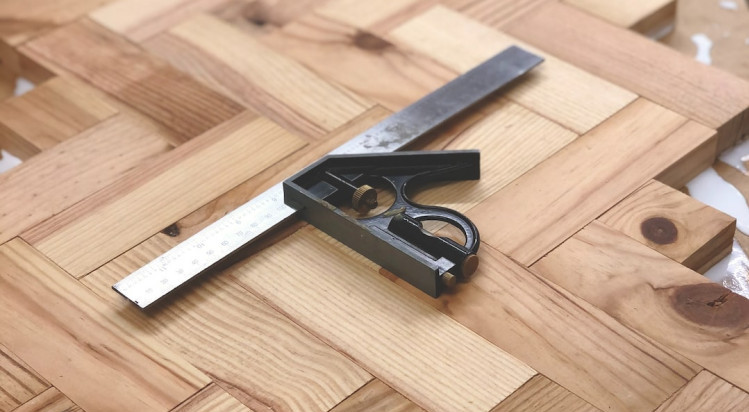
Back to the point, you don’t need expensive tool. You can run down to any local Walmart or hardware store and buy yourself a hammer, tape measure, speed square, drill, a chop saw, or table saw, etc. It’s best and practical to start out with the cheapest. But hey, if you can and want to spend the money for that more expensive or name brand tool, by all means, go for it.
Better Tools Better the Projects
As you gain more confidence and your wood working skills increase, you want to buy the more expensive “toys”. When I said “toys”, I’m referring to bigger and better tools such as bigger table saws with a wider table or saw stands that helps with the miter chop saws which helps hold the lumber level (which is also another small detail in a better performance of a true 90 degree cut when the lumber is held at a level plane.) and so forth. Name brands such as Milwaukee, DeWalt, Kobalt, etc. can have a big impact on your performance when using with wood projects since they tend to last longer and provided you take care of the power tools, especially how you handle the power cords. You do not want to pull on the cord itself trying to unplug from a source of electric.
The link below in this post is an affiliate link of which I receive a small compensation from sales of certain items.
Click here for all your power tool needs and safety glasses. http://toolbarn.evyy.net/zNn5b6
Battery versus Electric
Battery tools is what I like using the most, but they do have limits. For example, as your wood working skills increase you may want to start using battery tools such as Milwaukee impact drills or saws reciprocating saw and etc. As if you couldn’t tell, I’m a Milwaukee fan. Those are great to use but when cutting boards or ripping boards its best to stick with electric. With electric, you have an almost, limitless source of power. Sure, the battery power tools are tough and can last for days but in my opinion, it is a tradeoff.
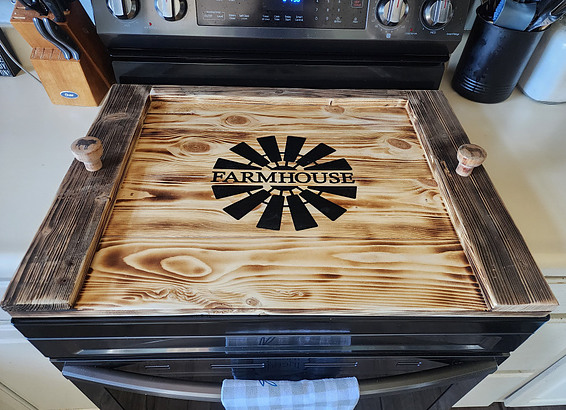
As your wood working skills increases, you will find yourself dabbling in other areas. My wife, Chrissy, bought me a small wood lathe. It isn’t big. As I’ve said before, start out small and cheap (not saying she bought cheap, but the wood lathe is not a high-end either). Bought a cheap set of wood lathe tools from Harbor Freight and tried for the first time on soft pine and was a little awkward as chunks were flying like tiny wooden pebbles. I ended up sharping the lathe tools on a table sander. Sharping the tips, you do not want a sharp edge like a knife. Instead, you follow the contour of the edge. A sharp edge on a corner will cut just as well. Believe me, I have seen 5/8” braided rope nearly cut in half from being rubbed back and forth on steel corners or flat sheet metal. So, after playing around and watching YouTube videos I thought about what wood projects I wanted to do. So far, I have made round wooden handle knobs from old utility poles then customize the tops of the handles by depicting cows and horses on them using the mod podge method. I used old lumber with nail holes still in the lumber and went to work on a noodle board. When I was done, I had created a refurbished item and torched it giving an old authentic look.
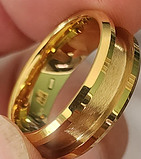
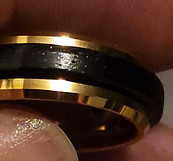
The best part of learning wood working is my daughter Kristianna, ask me if I could make a wooden ring for her fiancé. I told her let me see what I can do. I searched for a couple of weeks watching videos and tried but failed twice. But failure leads to success! On the third try, I made my first wooden ring. I was not totally satisfied. I bought a gold ring with a channel or grove in the middle and started shaping an ebony wood, carefully and slowly. Didn’t want to explode the wood apart on the wood lathe. Slowly but surely, (and after an hour of polishing the ring) I had made a gold ebony wedding ring for my daughter to give to her fiancé on. My daughter was floored and speechless as she held it in her hand. She loves it.
Conclusion
In conclusion, whether you are starting out as a newbie or a skilled wood working, you are still learning. I can truthfully say learning wood working has help me in many ways. It all comes down to problem solving. Somewhere in time, there will come a problem or a “hiccup”. Just the other day, I was building a huge deck for a client, and I thought I can dig the post holes with a post hole digger and not worry about renting a dirt auger. More than halfway done, I broke the right-side handle! Great! Later that night, I took the post hole digger apart transfer the pattern of the good handle onto a 2×6 pine. Using a table saw I roughly ripped along the one edge then clamped the rough handle down to my steel bench and used a grinder using a rough grit wheel. Of course, I used ear plugs and a dust mask and safety glasses, I quickly shaped the handle into the desired roundness shape I wanted. Problem solved. Works and feel great.
This is one of my many passions I have. I love learning wood working.
Any questions or comments please put them in the comment box below.
Thanks, Homer Patrick