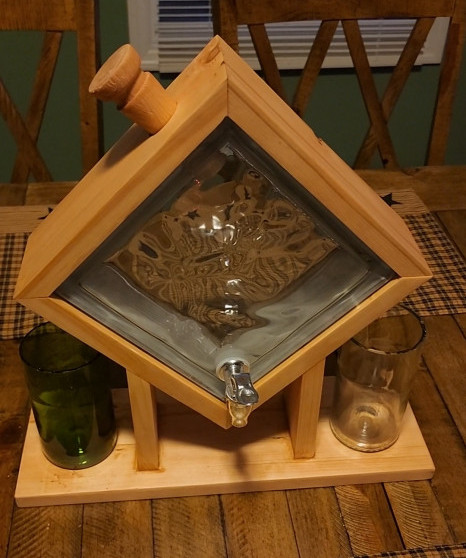
The first time I saw a whiskey decanter made from a glass block baffled me. A glass block! I took a double look at the glass whiskey decanter to make sure it was a glass block. The glass block is mainly used to build masonry window walls that allow natural light to enter a room or add a unique style to bathrooms and kitchens designs.
In this article, I’m going to show you step-by-step how I made mine. The first one I built, I bought a pine board, in case I messed up and put out a lot of money on the more expensive board.
Materials You Need
1 — 1”x4”x8’ pine board
1 — 1”x6”x8’ pine board
1 — 7 ¾”x 7 ¾” Glass block
1 — Spigot for beverage dispenser 3.15”x0.5”
1 — 18oz gorilla wood glue
1 — 1 box of 1 ¼” 18ga braid nails
1 —1 box of 1” 18ga braid nails
1 — tube of kitchen and bath silicone
Tools You Will Need
Hammer
Tape measure
Miter Saw
(“As an Amazon Associate, I earn from qualifying purchases”)
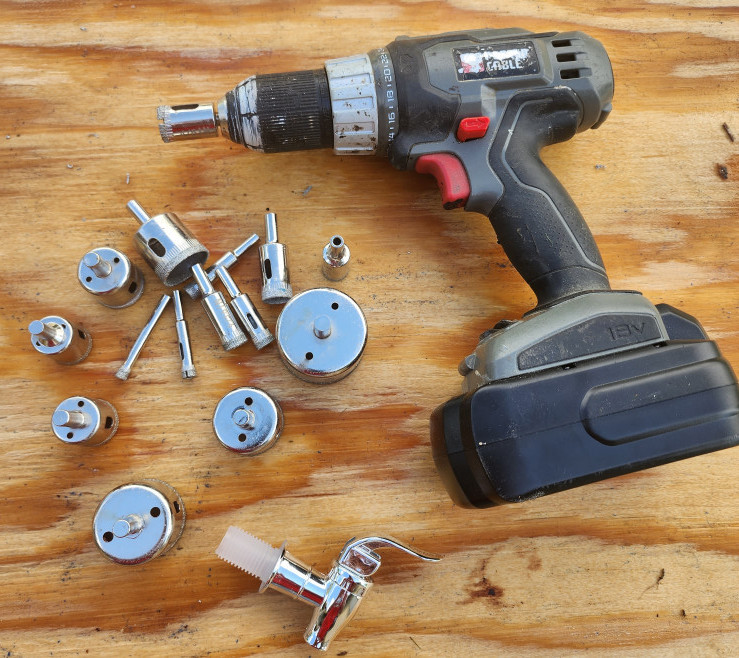
4/5” diamond hole saw for the spigot hole
1/10” diamond hole saw for the stopper hole
Drill
Sander and sandpaper 80 grit up to 220 grit
1 — Horusdy Band Clamp (this is a nylon ratchet strap for clamping pictures frames together)
Wen wood lathe to make a wooden stopper
Check out my review on the WEN wood lathe
A caliper
Making The Cuts
With the tape measure mark 10” on the 1”x4” and cut. Repeat with three more. Now move the miter saw lever to the 45-degree mark and lock it down. The next step is cutting the board at a 45-degree cut to the left. With one of the 1×4, stand it upwards on its edge braced against the miter saw back rail on the right-hand side of the miter saw. Slowly cut through the board.
The next step is to measure from the tip and place a mark at 9 ¼”. Swivel the miter saw lever to the right side to 45 degrees and lock it down. This will cut the right-side angle we need. Place the board on the left side of the miter saw against the back rail. Lowering the head of the saw see where the saw blade will cut. Adjust the wood ensuring the tip of the mark is not going to be cut off. You want the board exactly 9 ¼”. Cut the board slowly. Now the board should have a 45-degree cut going in the opposite direction.
Repeat the same process with the other three boards.
Assembly Around the Glass Block
Now it is time to see if the four boards will fit around the glass block. With all four boards, place them around the glass block. One at a time spread some gorilla wood glue on one of the cut ends and attach it to another board. Repeat the same process with all the boards. You don’t need a lot of glue but don’t use sparingly either. Spread the glue until the whole area is covered. The excess glue will be wiped away and sanded later.
Next place the Horusdy Band Clamp around the outside of the frame and tighten. Let the glue dry for an hour.
After the glue has dried take the rachet off and pull the frame away from the glass block. Next, take the air gun and shoot the braids into each of the corners. Take a small nail punch and drive the braids until the heads are below the wood surface. Put a small amount of wood putty into the holes and let dry.
After the wood putty dries start sanding using the 80 grit and work up to 220 grit or until the smoothness of your desire. You can have the smoothness of your choice.
The links within this post are affiliate links of which I receive a small compensation from the sales of certain items.
Making the Stand
The next step is to cut two boards at 7” from the 1×4. Next is to place the board on its edge and cut a 45-degree left-hand cut. With the other 7” board placed against the back rail and make a right-hand angle cut. Next, take the wood frame and turn it so the square frame is now a diamond.
Place the 7” boards next to the bottom. From each corner of the diamond shape frame measure 5” along the side and place a mark. On the other side do the same. This is where the 7″ legs are going. Glue and shoot 1 ¼” braid nails from inside the wood frame. If your air gun is too big to fit inside the frame, then try at a different angle. Not too much of an angle. You still want as much as the nails in the wood.
On to the next step. Cut 16” from the 1×6. This is going to be the base for the whiskey decanter. After the glue has dried for an hour for the support legs place the frame and support legs onto the base. Center the legs by measuring from both edges of the legs until you have the same measurement. Lightly mark with a pencil to show where the support legs will be. Set the wooden frame back down. Here you can have the wooden frame up on something that will give the height needed so the support legs and the mark on the base are at the same height. Place some glue at the edges and smear it and then use the air gun using the 1 1/4” braids.
Cutting Holes and Adding the Spigot
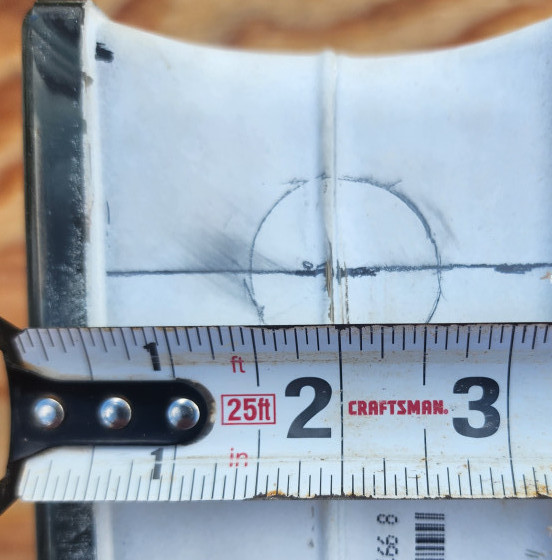
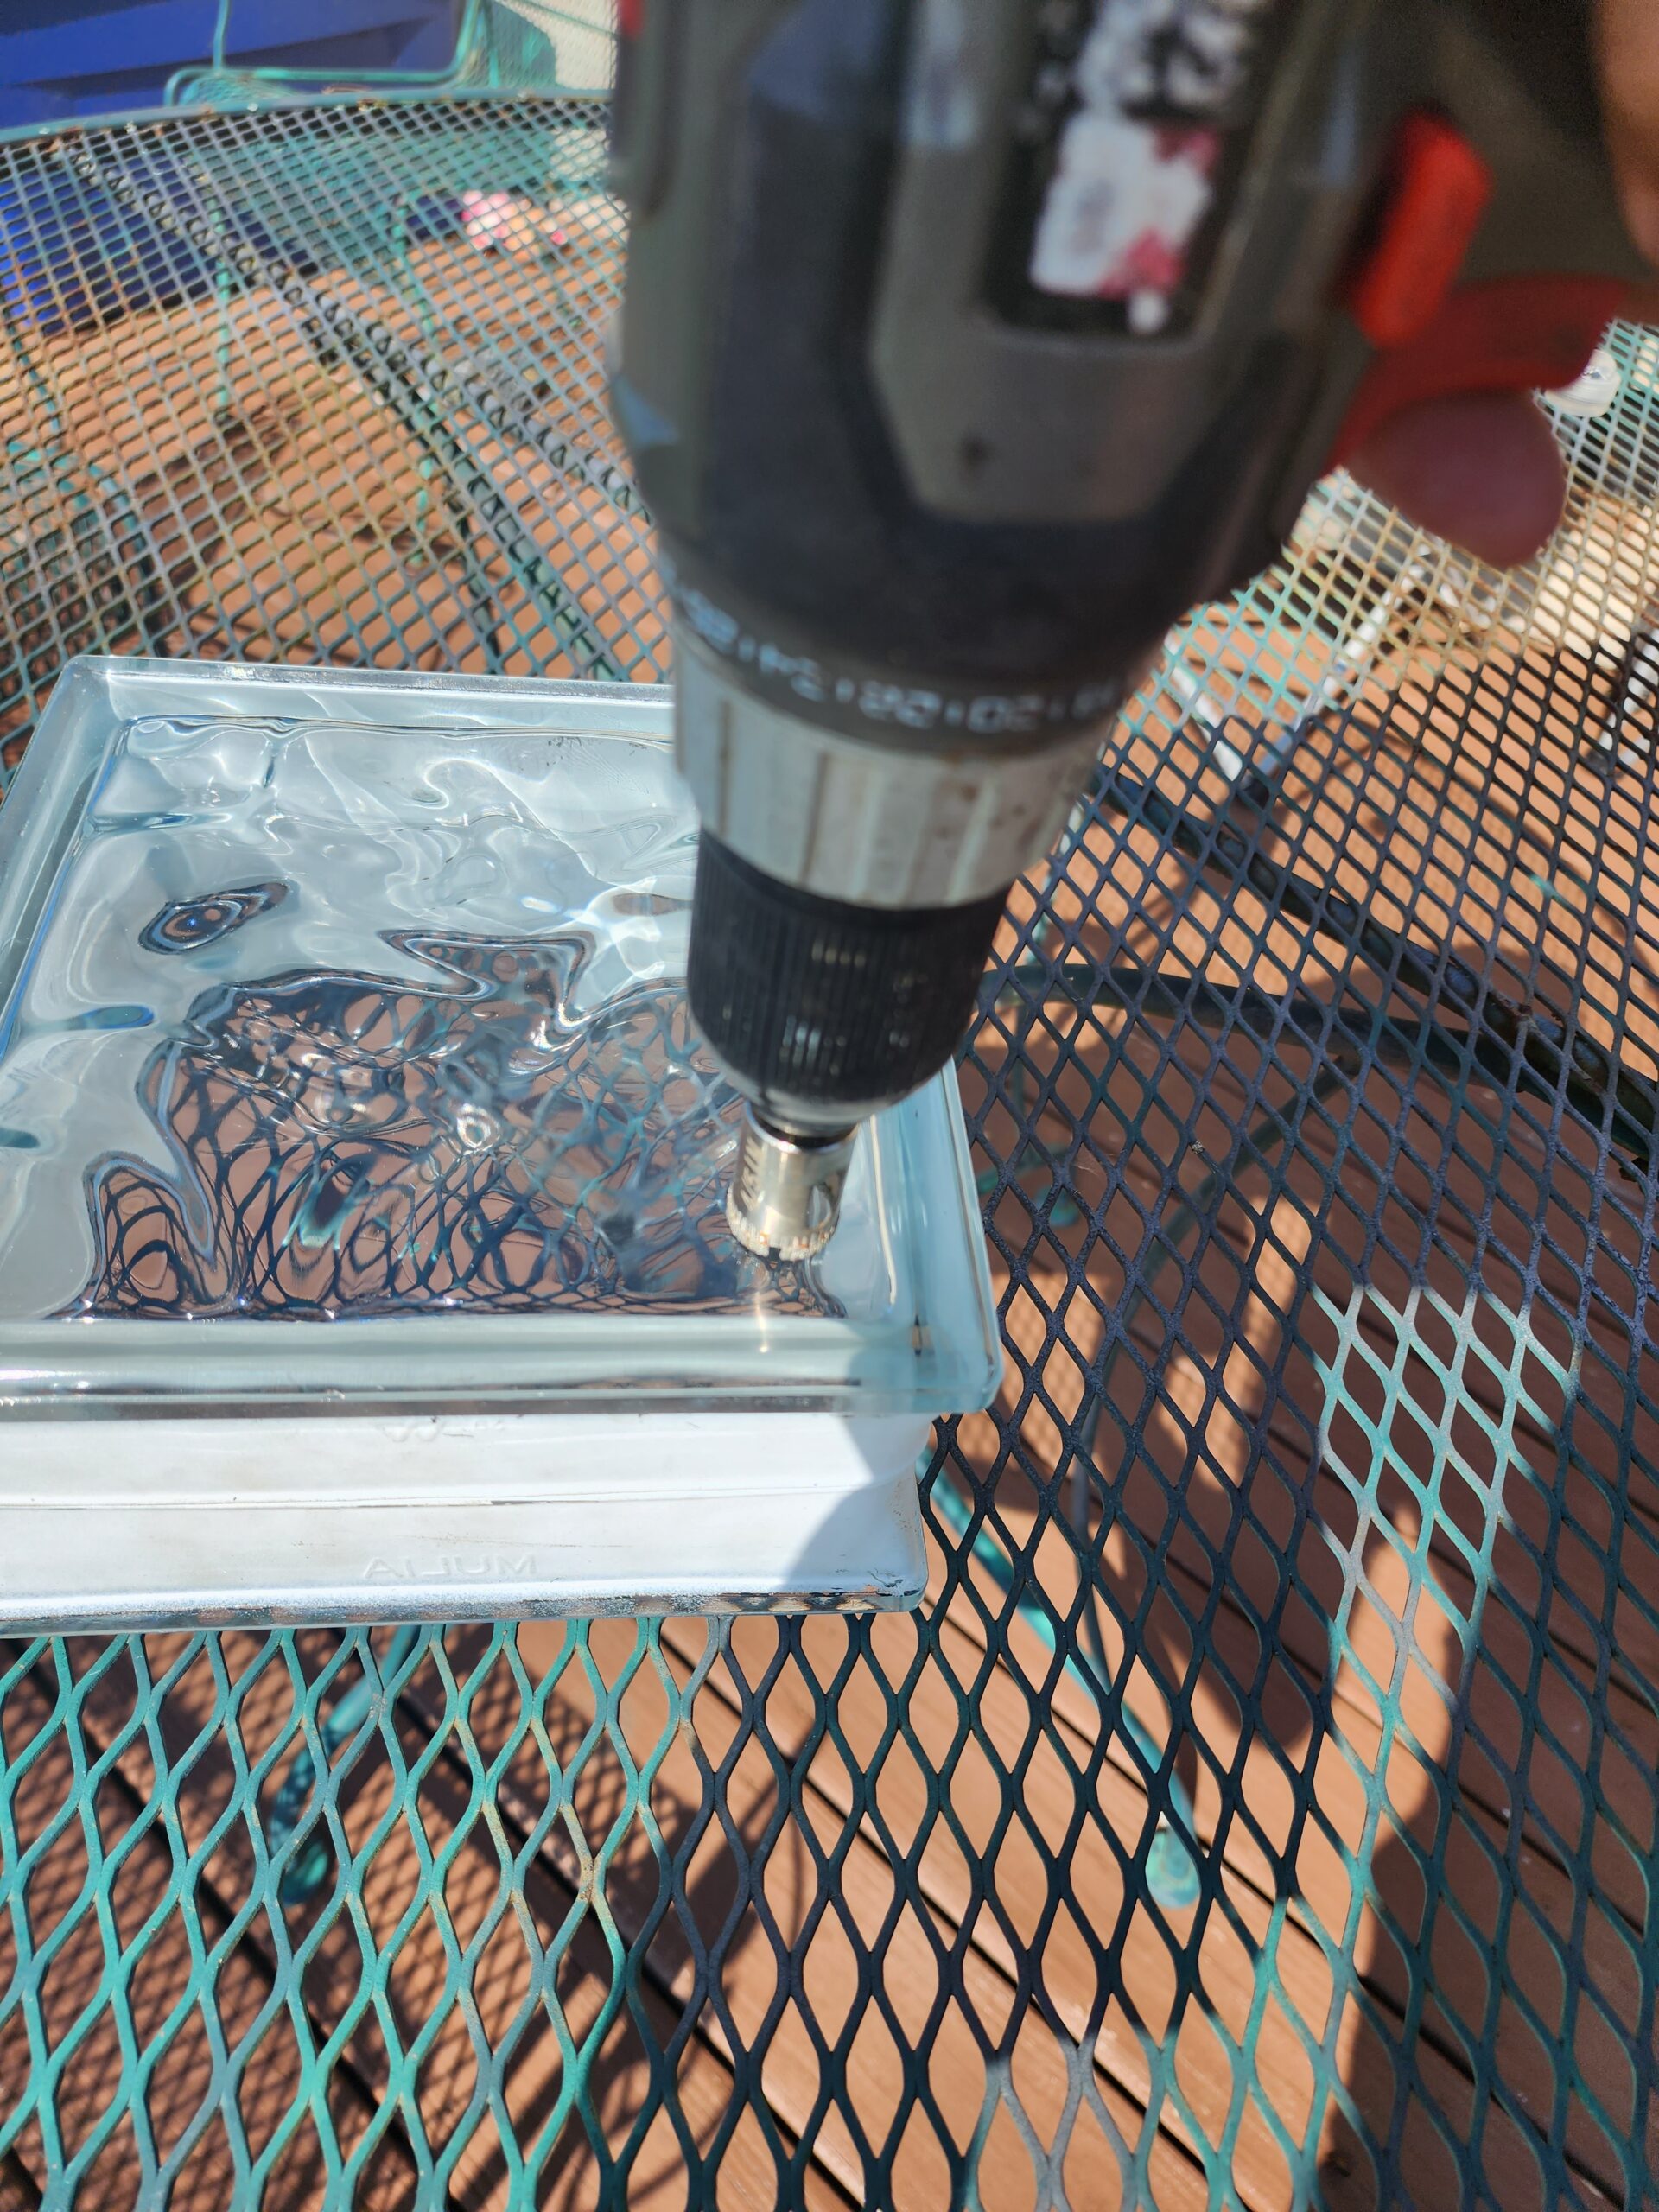
With the glass block mark, the center of the block is to have the hole drilled for the stopper. The raised spine of the block represents the center. Measure down from the top edge 1 ¾” to get the center of the hole. Mark on both sides and trace across forming the crosshair. I used the 1/10” hole saw and slowly drilled. The hole saw will walk so go slow and use water. Pour a little bit of water at the base of the hole saw. 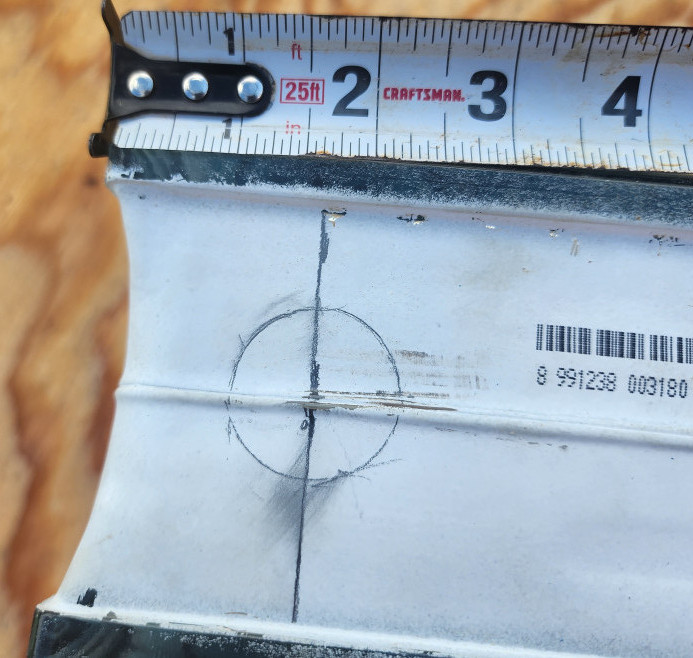
Next is to use the 4/5” diamond hole saw on the side of the glass block. Here, take extreme measures to keep the drill from moving. Here, drill slowly and only use low power. Again, use plenty of water and let the hole saw do the work. Don’t push down on the drill. Only apply light pressure.
After the holes are done, rinse the block out several times to get all the glass chips and dust out. Take the plastic nut off the back of the spigot and make sure the rubber washer is still on the spigot and drop the nut inside the glass block. Spread the silicone around the hole where the spigot will go and pass the threaded end of the spigot into the hole. With a long wooden rod and some patience tip the glass block so you can get the plastic nut onto the threaded end. Once you have the nut on wedge the rod to the side and turn the spigot until tight.
Wipe off the excess silicone around the spigot and let cure for 24 hours.
Now let’s get that hole cut into the top center of the wood frame.
I used my wood lathe to make my stopper. It is 3 ½” long with a taper that goes through the wood frame and into the glass block. I also used a caliper to measure the hole through the wood frame and used it to make sure the tapper on the wood stopper is the same.
You can seal the wood with any stain of your choice or perhaps take a torch and lightly torch the wood.
Final Thoughts
Now the whiskey decanter is sitting as a centerpiece on my alcohol cabinet. I have a lot of friends who ask me where I bought the decanter from. I smiled and told them I had made it. Now it seems everyone wants one.
Any comments or questions, please feel free to leave them.
Homer
You have great talent and that glass block whiskey decanter looks amazing!
It takes a lot of focus and artistic talent to do it, I’m sure.
You might want to make youtube videos about your work and projects.
I’m sure the ones who have the desire to learn to do woodwork projects will learn a lot from you.
Marita
Thanks for reading my article. I would love to start a YouTube channel. As soon as I get a chance I will. One of the ambassadors from WA is telling me I need to start a YouTube channel as well.
Best success to you,
Homer Patrick