Will You Make This for Me?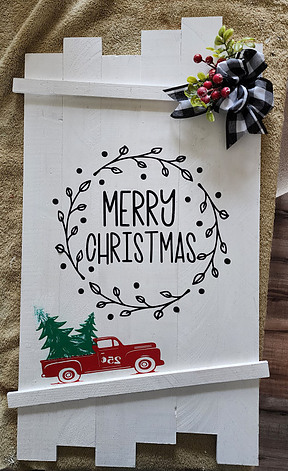
This past Christmas, I was asked to make a Christmas wall décor for a Christmas gift. “Sure, why not,” I replied. I tossed the ideas around for a day or so, and I decided to make the wall decor into a picket fence. The boards would slant at a slight diagonal going upward from left to right or right to left. Also, notes that I have picket slats at different various heights to give more eye appeal.
Also, I would incorporate the famous vintage red truck with a Christmas tree in the back. For the red truck and Christmas tree, I would have my Cricut cut the material.
Material Check List
For this project, you do not need much. It is always best to check the pine board for straightness. Hold the 1×4 board out in front of you and sight down the edge to see if it is straight.
1 – 1×4 pine board
A staple gun that uses staples or brad nails
1 box – 5/8” braid nails
Gorilla wood glue
Table saw
Miter or chop saw
1 — Picture hanger kit to hang the décor on the wall
Small bottles of paint from the craft department of your choice.
One small paintbrush and one 2” paintbrush
(“As an Amazon Associate, I earn from qualifying purchases”)
Cricut Explorer Air 2 buy from Amazon
Red, green, and white permanent vinyl
Another item you need is PPE (Personal Protective Equipment). It is always good to have safety glasses when running power tools. When operating the table saw or chop saw you need to wear safety glasses and ear plugs.
The affiliate link within this post, I may receive a small compensation from sales of certain items.
Cutting the Material
The wall sign will measure at 13 ½” wide by 25 ½” long. The first thing to do is cut the 1×4 pine board. Cut three boards at 23” long on a miter saw or chop saw. The next thing to do is rip the three boards at 2 ½” wide on the table saw by setting the fence and measuring from the fence to the side of the blade. Note: measure inside from one of the saw teeth pointing toward the fence. All saw teeth point in a different direction in segments. It is a good idea to check with both the tape measure and the table saw ruler on the side of the table to ensure the fence is true to the measurement.
Raise the height of the saw blade slightly above the wood. After the boards are ripped, the next thing to do is set the table saw fence to cut the boards at 3/8”. Stand the board upwards on its edge to be ripped in half. Cut from the fence at 3/8” with a push stick. Cut all three boards. Note: you will have two different thicknesses. Three boards will measure 3/8” and the other three will measure ¼”. The reason for the difference in measurements is that of the saw blade thickness when ripping the boards in half. If you want to cut three more boards at 25 ½” and rip them at 3/8”. In that case, you will need another 1”x4”x8’.
The next thing to do is cut a board from the 1×4 at 14 ½” long on the miter or chop saw. The next thing is to rip the 14 ½” board at the same measurement of 3/8”. Now, move the fence so 1” is shown by the tape measure and by the ruler on the table saw side.
Making the Picket Wall Board
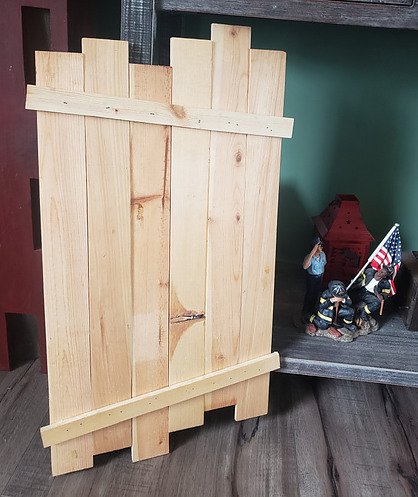
Now for the fun part! Lay the material out. Take the three boards of the same thickness and lay them side by side and the other three next to the other three on a worktable. You want the boards to be somewhat uniform in thickness. Placing the boards in this order will not leave any gaps when stapling the 14 ½” board in a diagonal direction. Next, take each slat and have them run up and down in different various measurements. There is no set measurement. I made sure of the overall measurement is 25 ½”.
Take gorilla wood glue and smear on the 14 ½” strip and place it on top of the six boards. Tilt the small board at a diagonal at the bottom (we will say the bottom is the closest to you) and leave ½” overhang on both sides. This will give the effect of the red truck going uphill if you use the red truck idea. With the staple gun load the 5/8” braid nails and with one hand hold the strip of wood in place and staple the small board down. Next, do the same for the top but tilt the angle going in the opposite direction.
Nail the picture hanging bracket on the back at the top center. The next thing on the list is to paint the wall plaque of your choice. I used antique white.
I ended up painting two versions. One was an antique white, and the other I painted black. The black sign, I ended up cutting the words Merry Christmas in white permanent vinyl and stapled greenery and holly berries to it.
Cutting the Red Truck and Christmas Trees
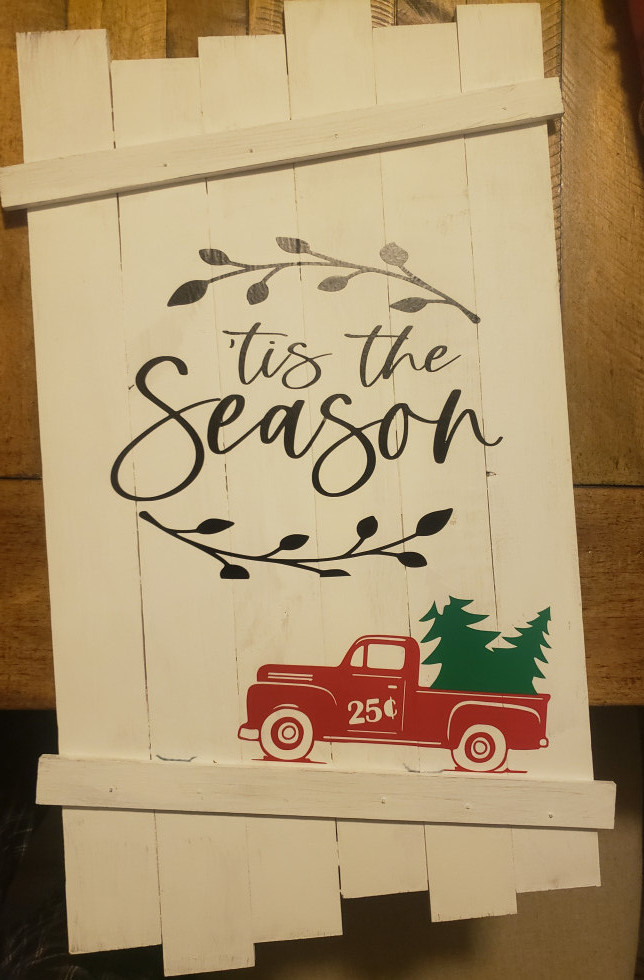
I have an account with Esty and paid for the red truck with the Christmas trees in the back. I used three different colors. Red, green, and white. Placing all three vinyl on the picket fence wall board with the truck facing upward as if going uphill. With the white tops of the Christmas trees, I used green paint and lightly put green streaks in to show more details as if the snow was lying on top of the branches.
Adding Greenery for a Final Touch
The white picket fence looked plain with the red truck and green Christmas trees sitting in the back of the bed. With some inspiration from my wife and my mom, both suggested adding some greenery to the top corner of the picket boards.
I must admit, adding greenery or some fancy bows with some greenery and with holly berries made the wall décor stand out tremendously.
If you like this article, you may also like to read Building Wooden Christmas Trees.
Final Thoughts
I decided to make several more of these Christmas picket board fences and sold them for $35 each. I realized I could make several more for next Christmas for extra cash. The Christmas picket fence wall décor hanging on my living room wall looked awesome with our eight-foot Christmas tree. Even though I made it, everybody who came over to socialize with my wife and me asked my wife where she got the red truck wall décor from. She nodded toward me and told them my husband made it for me.
In addition, you don’t have to hang the décor on the wall. You can lean it up against the Christmas tree or lean it against presents under the Christmas tree. My wife, Chrissy, decorates our Christmas tree and our living room for Christmas. I think it is a passion she has. For several years now, ever since she posted a picture of our tree on Facebook our friends and family post theirs as well. As I have said before, Chrissy loves to decorate. She even bought several red trucks and one black tree and placed them around the living room. One of the red trucks is two feet long and has small Christmas trees loaded in the back. Also, she placed Christmas sign stands along with other Christmas decorations. She is thinking of having a real train and tracks going around the Christmas tree soon.
Any questions or thoughts are welcome.
Homer P.